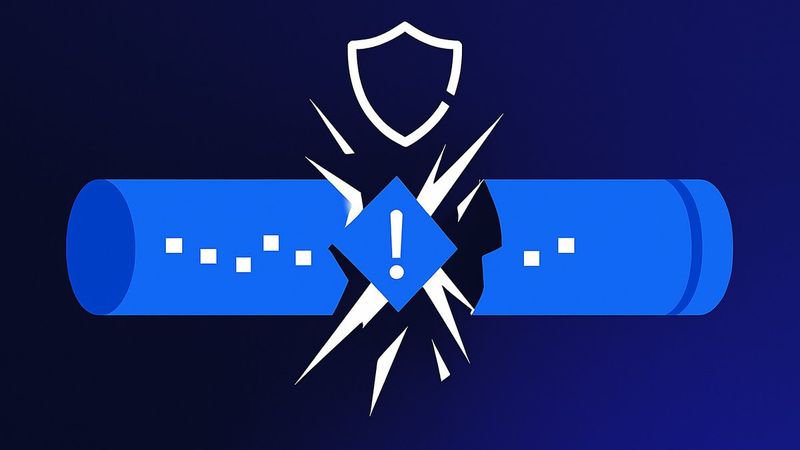

On April 19, 2026, Vercel — the platform that powers the frontend of thousands of startups and developer tools — confirmed a security breach. An attacker had compromised Context.ai, a third-party AI tool used by a Vercel employee, and used that foothold to access internal systems and environment variables. Within hours, a threat actor claiming to be ShinyHunters was selling the stolen data on BreachForums for $2 million. Vercel engaged incident response experts, notified law enforcement, and began contacting affected customers. You can read our full breakdown of what happened here: Navigating Vercel's April 19th Security Breach.
The speed and coordination of Vercel's response mattered enormously. But what about your company? If an attacker compromised a third-party tool you use tomorrow, would your team know exactly what to do in the first hour?
That's what an incident response plan is for. When something goes wrong, the last thing you want to be doing is figuring out who calls whom, which systems to shut down first, or whether you even have backups. That's the moment a plan either saves you or exposes you.
This guide walks through every phase of building one that actually works under pressure — not just one that looks good in a folder. Whether you're a CISO formalising an existing process or an ops lead who just got handed the responsibility, the steps here are concrete, sequenced, and built around what real teams need to execute.
What Is an Incident Response Plan and Why Does Your Business Need One
Definition and Core Purpose of an Incident Response Plan
An incident response plan (IRP) is a documented, pre-approved set of procedures that tells your organisation exactly what to do when a security incident, operational disruption, or data breach occurs. It defines who is responsible for what, how decisions get made under pressure, and what sequence of actions minimises damage and restores normal operations as quickly as possible.
The core purpose is not to prevent incidents. It's to ensure that when something happens, your team responds with coordination rather than chaos. According to the Canadian Centre for Cyber Security, a well-developed IRP reduces the impact of incidents by ensuring your organisation can detect, contain, and recover from threats in a structured way. Without that structure, every incident becomes a first-time problem, even if you've seen it before.
A good IRP covers the full lifecycle: preparation, detection, containment, eradication, recovery, and post-incident review. Each phase has defined owners, tools, and decision criteria. The plan doesn't replace judgment, but it gives your team a framework to apply judgment quickly when time is the most expensive resource you have.
The Real Cost of Not Having a Plan: Stats and Case Studies
The financial and operational cost of an unplanned incident response is consistently higher than the cost of building a plan in advance. Extended downtime, regulatory penalties, customer churn, and reputational damage all compound when a team is improvising rather than executing.
Hyperproof notes that organisations without a tested incident response capability face significantly longer containment times and higher breach costs than those with mature, rehearsed plans. The gap isn't marginal. Teams that have never run a tabletop exercise or defined escalation paths tend to spend the first hours of an incident just establishing who is in charge, time that should be spent isolating affected systems.
Beyond direct costs, there are regulatory consequences. Sectors including healthcare, finance, and critical infrastructure face mandatory breach notification timelines. If your team doesn't know how to identify and classify an incident quickly, you risk missing those windows and triggering additional penalties on top of the incident itself.
Who Needs an Incident Response Plan in 2026
Any organisation that stores customer data, runs business-critical software, or operates in a regulated industry needs a formal incident response plan. That includes companies with ten employees and companies with ten thousand. The scale of the plan should match the scale of the organisation, but the absence of a plan is never justified by size.
Bitsight points out that small and mid-sized businesses are frequently targeted precisely because attackers assume their defences and response capabilities are weaker. A 30-person company that processes payment data or holds client contracts has real exposure. The plan doesn't need to be a 200-page document. It needs to be specific, tested, and accessible to the people who will use it.
In 2026, the case for having a plan extends beyond cybersecurity. Supply chain disruptions, third-party vendor failures, and AI-assisted attacks have broadened the threat surface. Your IRP needs to account for incidents that originate outside your own systems, not just internal breaches.
Key Components Every Incident Response Plan Must Include
Roles and Responsibilities: Building Your Incident Response Team
An incident response team (IRT) is not just your IT department. According to Kroll, an effective IRT typically includes an incident commander who owns the overall response, technical leads who handle containment and forensics, a communications lead who manages internal and external messaging, legal counsel, and HR representation where employee data or conduct is involved.
Each role needs a named primary and a named backup. During an incident, people are unavailable, on leave, or unreachable. If your plan only names one person per function, you've already introduced a single point of failure before the incident even starts. Document contact information, escalation authority, and decision-making boundaries for every role.
The incident commander role deserves particular attention. This person is not necessarily the most technical person in the room. Their job is to coordinate, communicate, and make decisions when the technical team is heads-down. Separating the coordination function from the technical function is one of the most practical improvements most small teams can make.
Incident Classification and Severity Levels
Not every alert is a crisis. Your plan needs a clear classification system that tells responders how urgently to act and how far to escalate. Salesforce Engineering recommends defining severity levels with explicit criteria, typically ranging from low-impact informational events through to critical incidents that affect core business operations or expose sensitive data.
A common structure uses four levels: SEV-4 for minor anomalies requiring monitoring, SEV-3 for confirmed issues with limited impact, SEV-2 for significant incidents affecting customers or operations, and SEV-1 for critical incidents requiring immediate executive involvement. The exact labels matter less than the criteria. Each level should specify what triggers it, who gets notified, and what the expected response time is.
Without classification, every incident gets treated as either too urgent or not urgent enough. Both errors are expensive. Over-escalating minor events burns out your team and desensitises leadership. Under-escalating real threats delays containment and increases damage.
Communication Protocols and Escalation Paths
Your communication plan needs to answer three questions: who gets told, when they get told, and through what channel. Bitsight emphasises that communication failures during incidents are as damaging as technical failures. A team that is technically competent but communicating poorly will still produce a slow, disorganised response.
Define internal escalation paths by severity level. A SEV-3 might require notifying the IT lead and logging the event. A SEV-1 requires notifying the CEO, legal counsel, and potentially your cyber insurance carrier within the first hour. Write these paths down explicitly. Don't assume people will know who to call.
External communication is equally important. If customer data is involved, you may have legal obligations to notify affected parties within specific timeframes. Your plan should include pre-approved communication templates for customers, regulators, and the press, reviewed by legal before an incident occurs, not drafted during one.
Documentation and Evidence Preservation Requirements
Every action taken during an incident should be logged with a timestamp, the name of the person who took the action, and a brief description of what was done and why. This documentation serves two purposes: it supports forensic analysis after the incident, and it provides a defensible record if regulatory or legal scrutiny follows.
The HHS cybersecurity guidance specifically highlights the importance of maintaining chain-of-custody documentation for any evidence collected during an incident. If you ever need to involve law enforcement or pursue legal action, improperly handled evidence can undermine your position entirely.
Designate a documentation lead for every incident. This person's job is to maintain the incident log in real time, not reconstruct it from memory afterward. Use a shared, access-controlled document or incident management platform so the record is visible to all responders and preserved even if individual systems are compromised.
Phase 1 — Preparation: Laying the Groundwork for Your Plan
Conducting a Risk Assessment and Asset Inventory
You cannot protect what you haven't mapped. Before writing a single procedure, you need a current inventory of your critical assets: systems, data stores, third-party integrations, and the people who have access to them. The Canadian Centre for Cyber Security recommends starting with a risk assessment that identifies your most valuable assets, the threats most likely to target them, and the controls currently in place.
Your asset inventory should include hardware, software, cloud services, and data classifications. For each asset, note its business criticality, who owns it, and what the impact would be if it were unavailable or compromised. This prioritisation directly informs your containment and recovery sequencing later in the plan.
Risk assessment is not a one-time exercise. Your asset landscape changes every time you onboard a new vendor, deploy a new tool, or change a business process. Build a review cadence into your plan so the risk assessment stays current, not just accurate at the moment it was written.
Selecting and Configuring Incident Response Tools
Your tools need to be selected and configured before an incident, not sourced during one. Core tooling typically includes a SIEM (Security Information and Event Management) platform for log aggregation and alerting, endpoint detection and response (EDR) software, a ticketing or incident management system, and secure communication channels for the response team.
Red Canary notes that the tools themselves matter less than whether your team knows how to use them under pressure. A sophisticated SIEM that nobody has been trained on is less useful than a simpler tool that your team can operate confidently at 2am. Prioritise familiarity and reliability over feature count.
Document your tooling in the plan itself. Include access credentials (stored securely, not in the plan document), escalation contacts for vendor support, and fallback procedures if a primary tool is unavailable. If your SIEM goes down during an incident, your team needs to know what to do next without stopping to figure it out.
Establishing Baseline Security Policies and Procedures
Your incident response plan sits on top of a foundation of baseline security policies. If those policies don't exist or aren't enforced, your IRP will be patching gaps that should have been closed before any incident occurred. Hyperproof identifies baseline policies including access control, password management, patch management, data classification, and acceptable use as prerequisites for an effective IRP.
Write these policies in plain language and make them accessible to everyone they apply to. A policy that lives in a shared drive nobody visits is not an active control. Pair each policy with a procedure that explains how to comply with it in practice.
Baseline policies also define what "normal" looks like, which is essential for the identification phase. If you don't know what normal network traffic, login patterns, or system behaviour looks like, you can't reliably identify anomalies. Establishing and documenting baselines is both a security practice and a prerequisite for effective incident detection.
Training Your Team Before an Incident Happens
Training is not optional and it is not a one-time event. Huntress emphasises that teams who have never practised their response plan will not execute it well under the stress of a real incident. Muscle memory matters. The goal of training is to make the right actions feel automatic, not deliberate.
Training should cover role-specific responsibilities, tool operation, communication protocols, and escalation criteria. New team members should be onboarded to the IRP as part of their standard onboarding, not introduced to it during their first incident. Refresher training should happen at least annually and after any significant plan update.
Beyond formal training sessions, consider running informal walkthroughs of specific scenarios. What would you do if your primary email system was compromised? What if a key responder was unavailable? Walking through these scenarios in low-stakes settings builds the kind of situational awareness that makes real responses faster and more coordinated.
Phase 2 — Identification: Detecting and Confirming an Incident
Setting Up Monitoring, Alerting, and SIEM Integration
Detection is only as good as your monitoring coverage. If you're not watching a system, you won't know when it's compromised. Your monitoring setup should cover network traffic, endpoint activity, authentication logs, cloud service events, and application logs for any business-critical systems.
Palo Alto Networks recommends integrating your monitoring tools into a centralised SIEM so that alerts from different sources can be correlated. An individual alert from a single system might look like noise. The same alert combined with unusual authentication activity and outbound traffic to an unknown IP is a pattern worth investigating immediately.
Configure your alerting thresholds carefully. Too many alerts and your team becomes desensitised. Too few and real threats slip through. Start with high-confidence, high-severity alert rules and tune from there based on what you observe in your environment. Document your alert logic so that changes are deliberate and traceable.
Defining What Counts as a Security Incident
Not every anomaly is an incident. Your plan needs a clear definition of what constitutes a security incident that triggers your formal response process. Bitsight defines a security incident as any event that threatens the confidentiality, integrity, or availability of your systems or data. That definition is a useful starting point, but your plan should make it concrete with examples specific to your environment.
Examples might include: unauthorised access to a system or data store, malware detected on an endpoint, a phishing attack that resulted in credential compromise, a denial-of-service attack affecting customer-facing systems, or a third-party vendor reporting a breach that includes your data. The more specific your examples, the faster your team can make the call to activate the plan.
Define the threshold for escalation explicitly. A single failed login attempt is not an incident. A hundred failed login attempts followed by a successful one from an unusual location probably is. Your team needs criteria, not just intuition, to make that determination consistently.
Initial Triage: Separating False Positives from Real Threats
Initial triage is the process of determining whether an alert represents a real threat or a false positive. This step matters because both errors are costly. Treating a false positive as a real incident wastes resources and creates alert fatigue. Missing a real incident because it looked like a false positive allows the threat to persist and spread.
Salesforce Engineering recommends building triage checklists for your most common alert types. A checklist gives the analyst a structured way to gather the information needed to make a confident determination, rather than relying on gut feel under pressure. Common triage questions include: Is this behaviour consistent with known-good activity for this user or system? Has this alert fired before and been resolved as a false positive? Is there corroborating evidence from other systems?
Document triage decisions and the reasoning behind them. If a decision turns out to be wrong, that documentation helps you understand why and improve your criteria. If it turns out to be right, it gives you a record of when the incident was first identified, which matters for regulatory timelines and post-incident review.
Phase 3 — Containment: Stopping the Spread Quickly
Short-Term Containment Tactics to Isolate Affected Systems
Short-term containment is about stopping the bleeding. The goal is to prevent the threat from spreading to additional systems while you gather enough information to make longer-term decisions. Speed matters here, but so does precision. Shutting down the wrong system can destroy forensic evidence or cause additional business disruption.
Common short-term containment actions include isolating affected endpoints from the network (without powering them down), blocking malicious IP addresses or domains at the firewall, disabling compromised user accounts, and revoking active sessions. Red Canary recommends having pre-approved containment playbooks for your most likely incident types so that responders can act quickly without waiting for approval on every individual action.
Your containment decisions should be documented in real time. Note what was isolated, when, by whom, and what the business impact of that isolation is. This information feeds directly into your recovery planning and your post-incident review.
Long-Term Containment and System Hardening
Once immediate spread is stopped, long-term containment focuses on stabilising the environment while eradication and recovery are prepared. This phase may involve running affected systems in a monitored, restricted state rather than taking them fully offline, particularly if they support business-critical functions that cannot be interrupted.
Long-term containment also includes hardening adjacent systems that weren't directly affected but share characteristics with the compromised ones. If an attacker exploited a specific vulnerability on one server, assume the same vulnerability exists on similar servers and address it before moving to recovery. Hyperproof notes that failure to harden adjacent systems during containment is one of the most common reasons incidents recur shortly after apparent resolution.
Communicate the containment status clearly to stakeholders. They need to know which systems are affected, what restrictions are in place, and what the expected timeline is for full recovery. Silence during this phase creates anxiety and speculation that complicates your response.
Preserving Forensic Evidence During Containment
Forensic evidence preservation must happen in parallel with containment, not after it. Once you start modifying or restoring systems, you may permanently destroy evidence needed to understand how the incident occurred, who was responsible, and whether data was exfiltrated.
The HHS cybersecurity guidance recommends capturing memory dumps, disk images, and log files from affected systems before any remediation actions are taken. Store these captures in a secure, write-protected location with documented chain of custody. If law enforcement involvement is possible, consult legal counsel before taking any actions that could affect the admissibility of evidence.
Your plan should specify who is authorised to collect forensic evidence and what tools they use. Forensic collection done incorrectly can be as damaging as not collecting it at all. If your team doesn't have forensic expertise in-house, identify an external firm in advance and include their contact information in the plan.
Phase 4 — Eradication and Recovery: Removing Threats and Restoring Operations
Root Cause Analysis and Threat Removal
Eradication begins with understanding exactly how the attacker got in and what they did once inside. Without a clear root cause, you risk removing the visible symptoms while leaving the underlying vulnerability in place. Palo Alto Networks emphasises that incomplete eradication is one of the primary drivers of repeat incidents. The attacker simply returns through the same door.
Root cause analysis should answer: what was the initial attack vector, what credentials or systems were compromised, what actions did the attacker take, and what data was accessed or exfiltrated. Use your forensic evidence, log data, and threat intelligence to build a complete picture before declaring eradication complete.
Threat removal actions typically include deleting malware and malicious files, removing unauthorised accounts or access, closing exploited vulnerabilities, and resetting all credentials that may have been exposed. Document every removal action with the same rigour as your containment actions.
Patch Management and Vulnerability Remediation
Once the immediate threat is removed, address the vulnerabilities that made the incident possible. This is not the time for a slow patch cycle. The Canadian Centre for Cyber Security recommends treating vulnerability remediation during an incident as an emergency change, with expedited approval and deployment processes.
Prioritise patches based on the severity of the vulnerability and the criticality of the affected system. If a critical system has a known exploit that was used in your incident, that patch goes first. Document what was patched, when, and by whom. This record supports your post-incident review and demonstrates due diligence to regulators or insurers.
Use the incident as an opportunity to audit your broader patch management process. If the exploited vulnerability had been unpatched for months, that's a process failure worth addressing in your post-incident action items, not just a one-time fix.
Safe System Restoration and Validation Testing
Restoration is not just turning systems back on. Before any affected system is returned to production, it needs to be validated as clean and functional. Huntress recommends restoring from known-good backups where possible, rather than attempting to clean compromised systems in place. A restored system from a clean backup is more trustworthy than a cleaned system that may still contain remnants of the threat.
Validation testing should confirm that the system is operating normally, that the vulnerability has been remediated, that monitoring is active and generating expected alerts, and that no indicators of compromise remain. Run these checks against a defined checklist, not informally.
Restore systems in order of business criticality. Your most critical systems should be restored and validated first, with less critical systems following in sequence. Communicate restoration milestones to stakeholders as they occur so that business operations can resume in a coordinated way.
Communicating Recovery Status to Stakeholders
Recovery communication is as important as technical recovery. Stakeholders who don't know what's happening will fill the information vacuum with assumptions, often worse than the reality. Bitsight recommends designating a single communications lead who provides regular, structured updates throughout the recovery phase.
Updates should cover: what systems are restored and operational, what systems are still being recovered, the expected timeline for full restoration, and any actions stakeholders need to take (such as resetting passwords or avoiding specific systems). Keep the language plain and avoid technical jargon in communications to non-technical stakeholders.
If the incident involved customer data, your external communication obligations may require notifying affected customers, regulators, or both. Use the pre-approved templates developed during the preparation phase. Have legal review any external communication before it goes out, even if time pressure is significant.
Phase 5 — Post-Incident Review: Learning and Improving
How to Run an Effective Post-Incident Review Meeting
A post-incident review (also called a post-mortem or lessons-learned meeting) should happen within five to ten business days of incident resolution, while details are still fresh. Salesforce Engineering recommends running these meetings as blameless reviews focused on process and system failures, not individual mistakes. The goal is to understand what happened and improve, not to assign fault.
The meeting should include all key responders: technical leads, the incident commander, communications lead, and any external parties who were involved. Walk through the incident timeline chronologically, identifying decision points, delays, and gaps. Ask what worked well, what didn't, and what would have made the response faster or more effective.
Assign a facilitator who was not directly involved in the incident response. This person can ask questions without defensiveness and keep the conversation focused on systemic improvements rather than individual performance.
Documenting Lessons Learned and Action Items
Every post-incident review should produce a written report with two sections: lessons learned and action items. Lessons learned capture what the review revealed about your processes, tools, and team capabilities. Action items are specific, assigned, time-bound tasks that address the gaps identified.
Kroll recommends treating post-incident action items with the same priority as any other security initiative. If they get deprioritised in favour of normal business operations, the same gaps will produce the same failures in the next incident. Assign each action item to a named owner with a deadline and track completion in your standard project management system.
The lessons-learned report also serves as institutional memory. When team members change, the report preserves the context of why certain decisions were made and what the organisation learned from specific incidents. Archive these reports in a location that survives personnel turnover.
Updating Your Incident Response Plan After Each Event
Every incident reveals something about your plan that needs to change. Maybe a communication path was unclear. Maybe a containment procedure didn't account for a specific system type. Maybe a tool failed and you had no documented fallback. Red Canary notes that plans which are never updated after real incidents quickly become outdated and unreliable.
Update the plan within 30 days of completing the post-incident review. Assign the update to a specific owner, version the document, and communicate changes to all team members. Don't just update the text. Update the training materials, playbooks, and any automated workflows that reflect the old procedures.
Treat the plan as a living document, not a compliance artefact. Its value is proportional to how accurately it reflects your current environment, team, and threat landscape.
Incident Response Plan Templates and Frameworks to Reference
NIST SP 800-61 Incident Handling Guide Overview
NIST SP 800-61 (Computer Security Incident Handling Guide) is the most widely referenced framework for incident response in the United States. It defines four phases: preparation, detection and analysis, containment/eradication/recovery, and post-incident activity. The framework is technology-agnostic and applicable to organisations of any size.
The guide provides detailed guidance on each phase, including specific recommendations for log management, evidence handling, and coordination with external parties including law enforcement. It's freely available from NIST and serves as the foundation for many sector-specific incident response requirements. If you're building your first IRP and need a structural starting point, NIST SP 800-61 is the most defensible choice.
One practical note: the guide is comprehensive, which means it can feel overwhelming for smaller teams. Use it as a reference and a checklist rather than a template to fill in verbatim. Extract the sections most relevant to your environment and build from there.
SANS Incident Response Framework Breakdown
The SANS Institute's incident response framework uses a six-step model: preparation, identification, containment, eradication, recovery, and lessons learned. This structure maps closely to the phases covered in this guide and is widely used in security training and certification programmes.
SANS provides extensive training materials, whitepapers, and templates through its website and through the GIAC certification programme. Their incident handler's handbook is a practical, field-tested resource that complements the more formal NIST guidance. Many security professionals who have gone through SANS training will already be familiar with this framework, which makes it a useful common language for teams with mixed backgrounds.
The SANS framework is particularly strong on the technical execution side, with detailed guidance on forensic collection, malware analysis, and containment tactics. If your team is technically oriented, the SANS materials will feel more immediately actionable than the NIST guide.
ISO/IEC 27035 and Other Compliance-Driven Frameworks
ISO/IEC 27035 is the international standard for information security incident management. It provides a five-phase process: plan and prepare, detect and report, assess and decide, respond, and learn lessons. For organisations operating internationally or seeking ISO 27001 certification, aligning your IRP with ISO/IEC 27035 is both a compliance requirement and a quality signal to clients and partners.
Other compliance-driven frameworks include HIPAA's breach notification requirements for healthcare organisations, PCI DSS incident response requirements for organisations handling payment card data, and SOC 2's availability and security incident requirements for service providers. The HHS cybersecurity guidance provides specific IRP requirements for covered entities under HIPAA.
If your organisation operates under multiple regulatory frameworks, map your IRP to each one explicitly. Identify where requirements overlap (most do) and where they diverge. A single well-structured plan can satisfy multiple frameworks if it's designed with that goal in mind.
Free Incident Response Plan Templates Worth Using
Several credible sources publish free IRP templates that provide a useful starting structure. Red Canary's incident response plan template is practical and field-tested, built around the realities of how security teams actually operate. Huntress also provides accessible guidance oriented toward smaller teams without dedicated security staff.
NIST's Computer Security Resource Center provides downloadable versions of SP 800-61 and related publications at no cost. The SANS Reading Room contains dozens of incident response templates and case studies, many freely accessible without registration.
Use templates as scaffolding, not finished products. A template that hasn't been customised to your environment, team structure, and specific risks is not a plan. It's a starting point. The value comes from the work of adapting it to your actual situation.
Testing and Maintaining Your Incident Response Plan
Tabletop Exercises: How to Run Them and What to Measure
A tabletop exercise is a structured discussion where your incident response team walks through a simulated incident scenario. No systems are touched. The goal is to test your plan's logic, identify gaps in roles and procedures, and build team familiarity with the response process before a real incident occurs.
Bitsight recommends running tabletop exercises at least annually, with additional exercises after significant changes to your environment or team. A good scenario is realistic, specific to your industry and threat landscape, and complex enough to require decisions at multiple points. Avoid scenarios that are so catastrophic they feel implausible. The most useful exercises test the decisions your team is most likely to face.
Measure the exercise against specific criteria: Did the team correctly classify the incident severity? Were the right people notified within the expected timeframe? Were containment decisions made within the plan's guidelines? Document gaps and assign remediation actions. The exercise is only valuable if it produces changes.
Red Team and Penetration Testing Integration
Red team exercises and penetration tests go further than tabletop exercises by actually testing your detection and response capabilities against simulated attacks. A red team will attempt to compromise your systems using real techniques, and your blue team (defenders) responds as they would to a real incident. The gap between what the red team achieved and what the blue team detected is a direct measure of your response capability.
Hyperproof recommends integrating penetration testing findings directly into your IRP update cycle. If a pen test reveals that a specific attack vector goes undetected by your monitoring, that's a gap that needs to be addressed in both your technical controls and your detection procedures.
Red team exercises are more resource-intensive than tabletop exercises and may require external expertise. For smaller organisations, a focused penetration test of your most critical systems is a practical starting point. The findings will almost always surface IRP gaps worth addressing.
Scheduling Regular Plan Reviews and Version Control
Your incident response plan should be reviewed on a defined schedule, regardless of whether an incident has occurred. The Canadian Centre for Cyber Security recommends reviewing your IRP at least annually and after any significant change to your environment, team, or threat landscape.
Version control is not optional. Every update to the plan should be versioned with a date, a summary of changes, and the name of the person who approved the update. This creates an audit trail and ensures that everyone on the team is working from the same version. Store the plan in a location that is accessible during an incident, including when your primary systems may be unavailable.
Assign a named owner for the plan's maintenance. Without a specific owner, reviews get deferred indefinitely. The owner is responsible for scheduling reviews, incorporating post-incident updates, and ensuring that all team members have access to the current version.
Common Mistakes to Avoid When Developing an Incident Response Plan
Skipping the Risk Assessment Phase
The most common shortcut in IRP development is jumping straight to procedures without first understanding what you're protecting and what you're protecting it from. The Canadian Centre for Cyber Security is explicit that a risk assessment is the foundation of an effective plan. Without it, your procedures are generic rather than targeted, and your team will spend time during an incident figuring out priorities that should have been established in advance.
A risk assessment doesn't need to be a months-long project. A focused two-day exercise that maps your critical assets, identifies your most likely threat scenarios, and documents your current controls is enough to give your IRP a solid foundation. The output directly informs your severity classification, containment priorities, and recovery sequencing.
Failing to Define Clear Roles and Ownership
A plan that says "the IT team will handle containment" is not a plan. It's a placeholder. Kroll identifies undefined roles as one of the primary reasons incident responses fail in practice. When everyone is responsible, no one is responsible. During a high-stress incident, ambiguity about who makes decisions leads to paralysis or conflicting actions.
Name specific individuals for every role. Document their backup. Define the boundaries of each role's authority. Who can authorise taking a production system offline? Who can approve external communication? Who can engage law enforcement? These decisions need to be